Goulburn - Construction, January 2016
Full layout framework assembled for the first time.
In January we obtained the use of a nearby local hall for one weekend. The whole layout was assembled for the first time, putting up all of the modules on all the legs and connecting the modules together. We were now able install the module joining system for the 2 new end modules to each adjacent straight module. First we drilled out for installation of the brass dowel pins for all 4 joins, 2 brass dowels per join. This method of aligning adjacent modules to each other was previously described in the February 2014 Construction Update.
Then we prepared each module for installation of the connecting latches. We had decided to change from loose-pin hinges to over-centre clamps (or latches) as it made the modules quicker and easier to connect and separate, and the latches allowed us adjustment to pull the modules together and ensure that they were firmly joined. To accommodate this change we had to open out the timber framing on the module ends a little, to allow clearance for the connecting latch to pass through and to fasten over the hook part mounted on the other module. After some minor carpentry to each end of each module we soon had all the latches mounted and all the modules mechanically connected and aligned. The latches have a screw thread to allow for some adjustment so we tweaked them to ensure the modules were snugly held together. A quick pass over the top surfaces of the modules with a belt sander ensured we had an even transition for laying track across them.
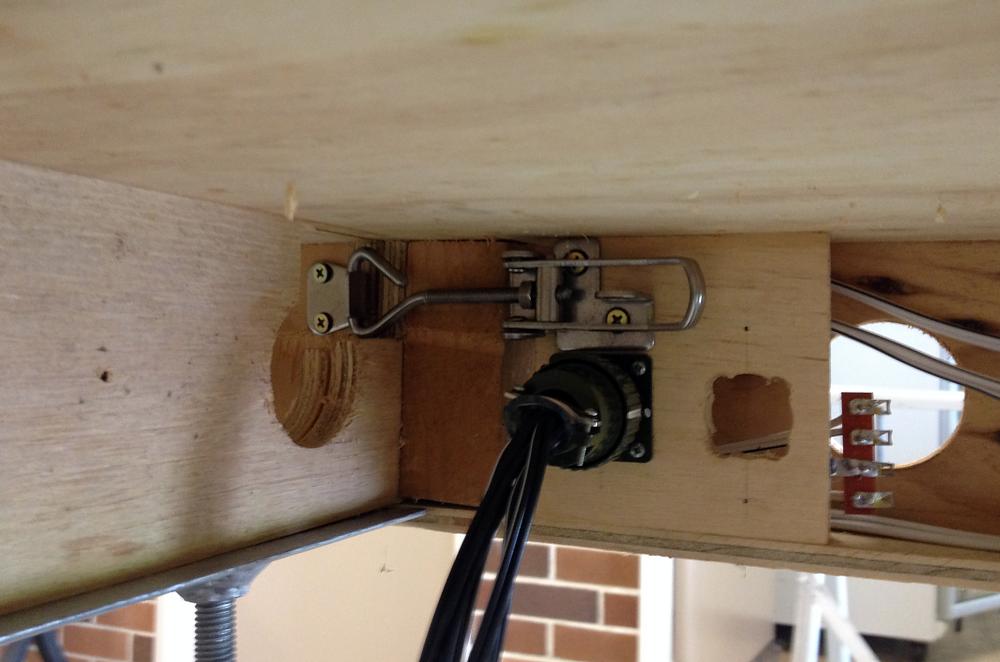
A picture of an over-centre clamp or latch used for joining modules together.
One of the latches shown installed and holding the modules together.
We started setting out the trackwork on each end module, concentrating on one module at a time. A large trammel was made from a length of pine with a screw inserted for the centre point, and a series of holes drilled to hold pencils for our corresponding track radii. Our minimum radius is 750mm and with multiple tracks going around the curves we worked up from there to the larger radii required for the outer curves. Points were placed where we wanted them according to our track plan and once we were happy with everything we started laying track. All track was laid on 3mm thick cork. The cork was split lengthwise into 2 strips which made it easier to follow the pencil marks of our track setout, and also allowed the cork to more easily follow the curves.
Holes were drilled in the ply top underneath each turnout: a large hole for the wire from the Tortoise point motor to the point that will actuate the movement of the turnout, and smaller holes to take feeder wires for track power and frog power.
our tried and true method of securing the track across module joins was used. Strips of blank copper-clad fibreglass printed circuit (PC) board are screwed to the ply top where the track will cross modules. A full piece of track is positioned and the sleepers where the PC board is located are removed from the rails. The track is laid across the join in one piece, after which the rails are soldered to the PC board. A detailed view of track joins between modules can be seen in the Wallerawang March 2009 Construction Update.
Track laid across module join at Sydney end of the goods shed module.
Track laid across module join from Sydney end module to rear storage yard.
Once all track was fully laid to our satisfaction we then cut through each of the rails over the module joins using a sharp razor saw. The modules were then able to be separated by undoing the latches. We did this a few times at each end, disconnecting the latches and pulling the modules apart, then putting them back together again and doing up the latches again. With the brass dowel pins for alignment and the latches physically holding the modules together we found all modules went back together exactly as planned and all rails aligned perfectly each time.
This was our golden spike moment completing all track laying for the layout. Now time to wire them up and test run some trains!
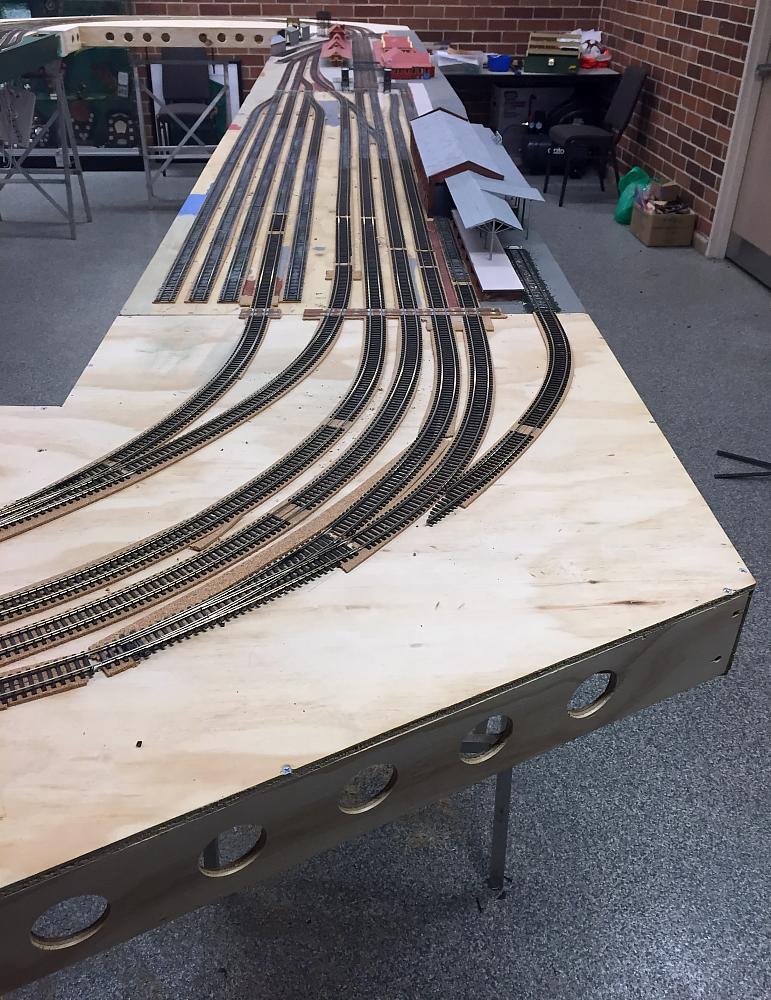
View of all track laid on Sydney end module.
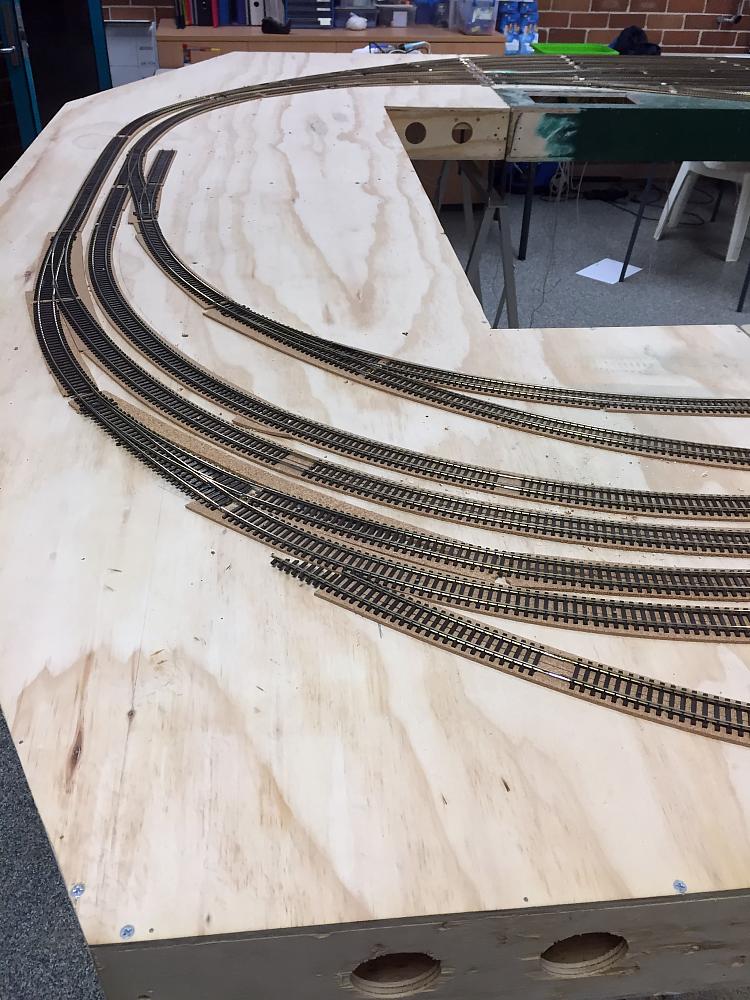
View of all track laid on country end module.


